sounds, signals, studies, soul, ETC…

Alesis DM Pro surgery 1; internal memory battery

Distinction:

I have a long and complex history with the Alesis DM Pro. It’s a uniquely powerful and expressive device, specifically in how one can custom-program both natural and novel drumming expression between modulation Sources

  • hit velocity
  • hit rate (think “swells”)
  • random variation
  • many others…

…and the resultant sound controls.

  • pitch
  • amplitude gain and envelope controls
  • filter cutoff and envelope control
  • many others…

I spent a LOT of time programming and personalizing it to get the most flexible e-drum system I could out of it, and as it’s outputs started to fail, I realized I could keep the unit and dump all my hard-earned programming into a new (likely cheaper) unit.

In fact, I picked up a second DM pro that was in rough shape for spare parts or frankenstein-ing.

The Brain’s brain fails:

However, when I booted it up this month, I started seeing scrambled patch names, and when I tested it’s saving of trivial changes, it failed to retain them. I immediately (re)backed up all my DM Pro kits and Globals into SoundDiver.

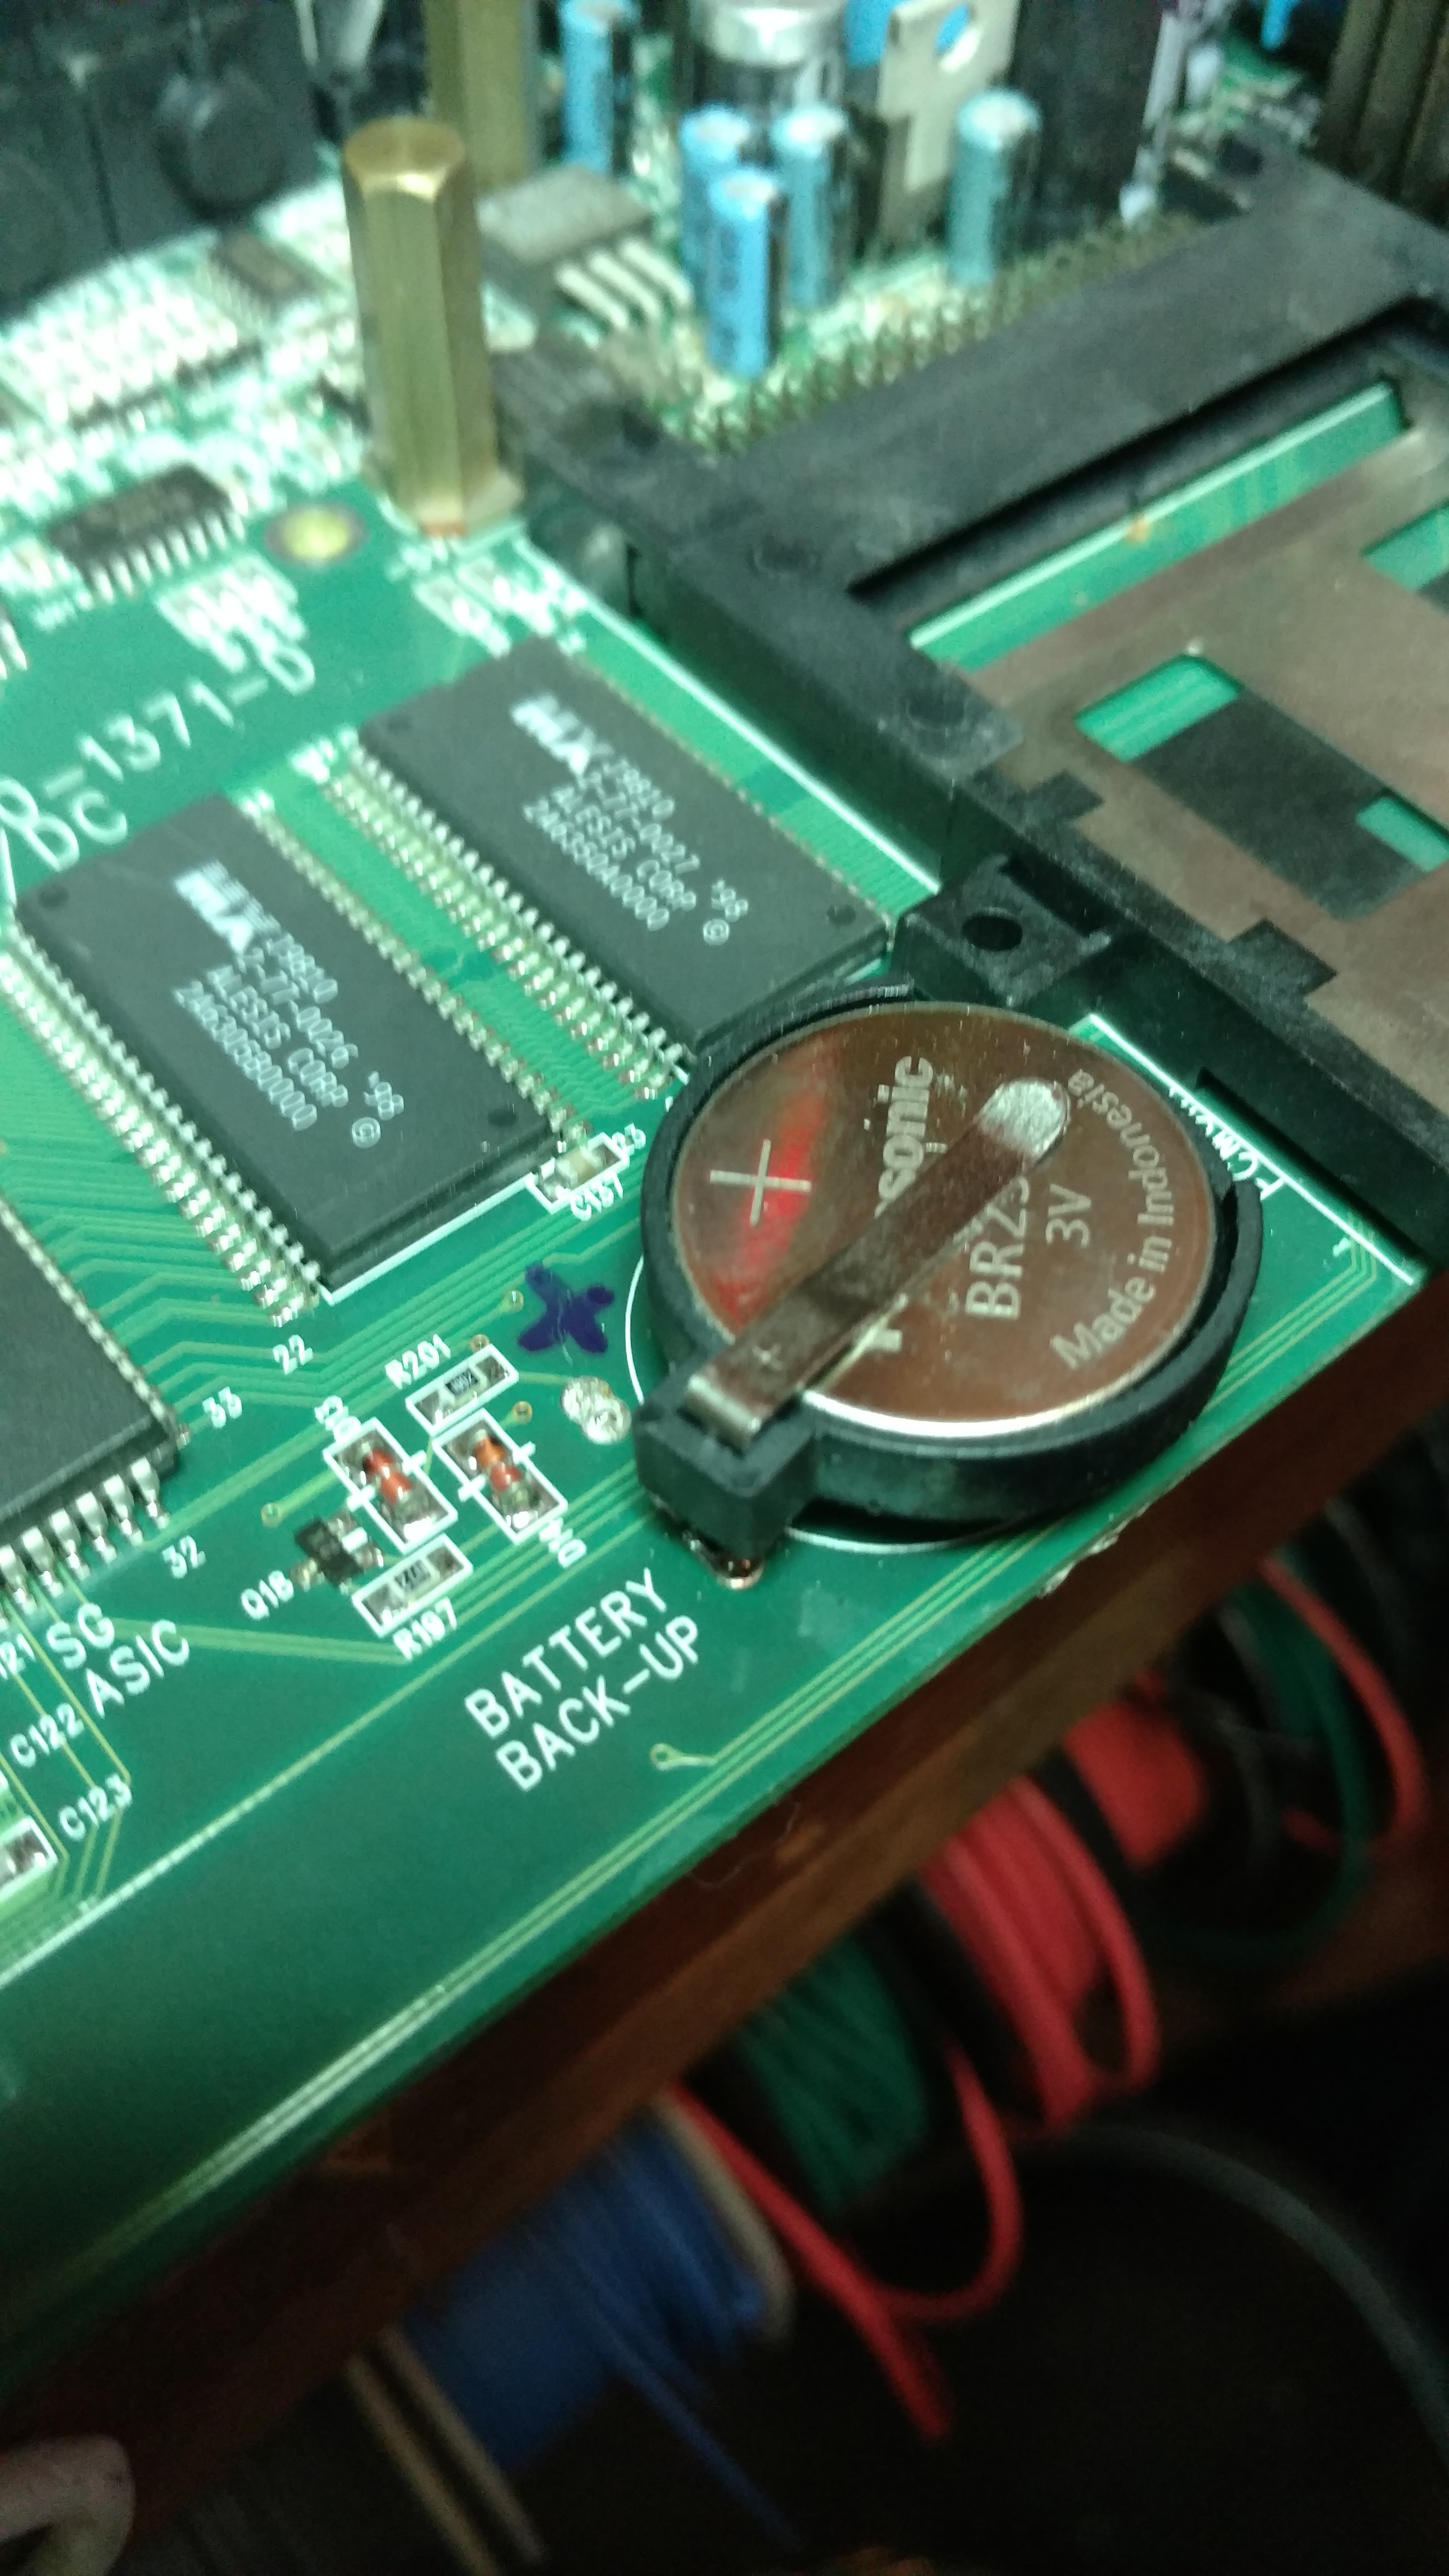
In this unit, like most programmable gear from the 90s, patches are stored in (non-flashing) memory chip(s)  powered by a coin-sized battery that keeps them charged while the unit is powered down. Whenever a unit (especially from 80s and 90s) starts wiping all the presets, check for a little coin battery.

IMG_20170830_172842207.jpg
many units come stock with single-use batteries which solder directly to the board. These are often designed to only last a few years (often RIGHT past manufacturer warrantee).


To the Bench 

Opening the DM pro up is tricky.

IMG_20170830_172815792
the unit’s main “hood” is a full-width panel with hoods to the sides: be careful with those recessed screws.


IMG_20170830_172833444.jpg
once open, we can see how the battery is on the motherboard, with two ribbons to a Front Panel UI board, and a a ton of I/O


IMG_20170830_211306417.jpg
getting lined up to try with battery, initially buying another of the exact “single use solder in” battery found inside.


Spec:

for reference: this project involved.

  • initial purchase of a Panasonic BR-2325-HG panel-mounted battery
  • upgrade to CR2025 coin-button battery holder


IMG_20170830_211202685
before proceeding, I chose to upgrade to a battery housing for easier future service.
IMG_20170830_211447226.jpg
in order to do soldering on that battery, you have to pull out the motherboard, which requires removing EVERYTHING around it. be careful to sort all the nuts, screws, etc on your way in.
IMG_20170901_125337351.jpg
the Front Panel UI board was tricky, as it has criss-crossing ribbon cables that should not be confused.
IMG_20170901_125414547.jpg
once disconnected, the Front Panel can come right off
IMG_20170901_125626363.jpg
careful in dismounting the MotherBoard from the main chassis

Practical Problems of Polarity

IMG_20170901_130411967.jpg
I metered the existing battery for polarity


IMG_20170901_130123345.jpg
Mark the polarity on the PCB, just to be idiot-proof, because…
IMG_20170901_132655288.jpg
…the out-going battery had 3 tabs, so you could only install it “right way in” polarity…

IMG_20170901_132847816.jpg

…but the incoming battery only has two, so I have to “get it right”

Making it fit:

IMG_20170901_132947983.jpg
the solder-tabs on the incoming Battery Holder were too wide to fit the open holes on the motherboard, so I used a file…
IMG_20170901_133203811.jpg
…making the battery-case
IMG_20170901_132734295.jpg
now the battery case fits nicely for a fresh LiOn battery.


Power ON ?

after reversing the process to re-assemble the parts enough to power on, I found the unit suddenly showed symptoms WORSE than “memory wipe”

it Showed NO screen or response to front panel board.

Before panicking, checked my work and realized I’d mis-mounted a standoff.

IMG_20170901_134304238.jpg

After remedy of that mistake, I everything worked fine, and it could now save patches through  power cycles (again), so I reassembled the unit for future use.

back to “normal” (for now)


Comments

2 responses to “Alesis DM Pro surgery 1; internal memory battery”

  1. Mitch Weiner Avatar
    Mitch Weiner

    I am a professional edrummer using an alesis dm pro since the 90s. Im buying a backup and I came across a seller that has changed his batery recently. Ive never done it and have had it since the late 90s. How is that possible and is it going out at tomorrows night gig, lol. Either way this is so beyond what I can do so am really worried not only about mine buyt buying another used dm pro. This thing is the reason why I am sought after edrummer with amazing sounding kit. I midi it to my roland td 17. Im in fort collins colorado and do have a shop that specializes in fixing old synths but am wondering if he could do this. Do I have to backup the sounds before replacing tha battery? How?

    1. thepatrickrichardson Avatar

      Hey Mitch. Glad to hear that the DM-Pro is still rocking for you. The DM-Pro can be fully backed up (sounds, kits, etc), with a Sysex dump to/from any basic midi sequencer…but I use the editor/librarian SoundDiver (last worked on Windows 95/98, so I have to run it in emulation). It’s has helped me learn the depth of power/potential of my DM-pro, to helping me personalize my sounds (and copy good ideas quickly), and to preserve “my DM-Pro” in spirit from the old/dead on to the new/refurbished brain… Highly recommended, but it takes some learning. If you’d like me to help remediate any of this, contact and we can do a video chat. Cheers !

Leave a Reply to Mitch WeinerCancel reply

Discover more from Music Lessons + More w/ ThePatrickRichardson

Subscribe now to keep reading and get access to the full archive.

Continue reading